I didn't want to post this past wk so you won't have to scroll to see my space, but it's time to get back to blogging :)
First a PSA (public service announcement) i like to say on this day every year now~
DO NOT STICK NAILS OR PINS IN YOUR MOUTH WHILE HANGING PICTURES OR
SEWING! if you wonder why? read this to see just what can happen. to see the actual nail
click here. It is now nicely framed and hangs in the dining room as a reminder. :)
will add some pictures later of stuff from the past wk~
Monday, June 28, 2010
Saturday, June 19, 2010
Where Bloggers Create
 Disclaimer: my room doesn't "quite" look like this now-it's in the middle of being boxed up/reorganized and purged :)


As usual, late to the party~should have done this last night, but had another commitment...
Once upon a time, we moved into the home where we currently reside. It had 3 bedrooms and a game room. This meant that i would get the smallest bedroom for my artroom! yea. I couldn't wait-no more dining table for me. I got 2 cabinets from a building surplus store for the base of my table. that way i could house more stuff. One side was a 3-drawer cabinet and the other was one drawer and one door-small shelf inside to house some larger things. We came across and HEAVY piece of wood in a warehouse that my husband had access to-they used to build lockers for golf locker rooms and this was a piece they left. i cut it down to 6ft long by 3 ft wide. yes it would take up alot of room but that meant a friend could work on one side, me on the other if needed. and i could store stuff on top too at each end.
The game room was used as the computer/tv room. My son and his friends hung out there in HS. Many a night 1/2 the soccer team spent the night on that floor-i mention this because it's a good sized room-that came w/built in desk/shelves and wet bar. We had a tv, couch, desk and comp table in there. (and extra room)

Fast forward a few yrs when i my art room table was "full" and i moved projects out to the dining room, kitchen and living room. My husband looked around and said, "i think you need to move your artroom to the game room." I looked at him innocently and said "you think so?" (couldn't have planned that if i TRIED) but not that others can't learn from it :)
It was a task to pack up and just move down the hall-but oh so worth it. Now i had a sink in the room and didn't have to go into the bathroom for cups of water. and more space. One wall was taken up with the bar/desk but that was ok-it was mine.
Walk in and this is what you see-although i have removed the dresser now-it took up too much room for too little storage.

i found this red couch at an estate sale. couldn't pass it up as it a)was brand new practically and b)was a sleeper (for guests) Originally was going to go in the living room, but found something else since i couldn't find a piece at that time to go with it. That's ok, works in the art room.
 I'll just let the pictures speak for themselves. the room is currently undergoing another change-trying to purge and re-organize to fit more what art i'm doing now.
Alot of my "pretties" are put away for the time being. These containers were made for me by a friend-put to good use.

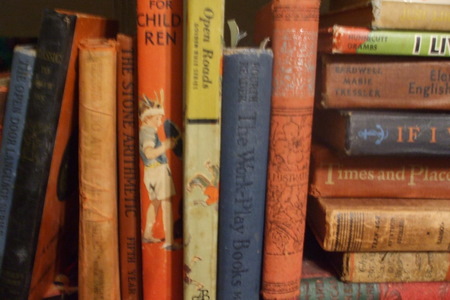
vintage stamps found at an estate sale for $8! Love old books to use for the words or just nostalgia

 my printers tray of "bling" (a portion of it anyway!) and my lights! i have lights hanging all over the room-mostly halloween but it makes it magical at night~
and for all those who hear comments from people-or your spouse- that don't "get it" when it comes to our stash/hoarding tendancies: I have a friend who was robbed some yrs ago. The only room in the house they didn't touch was her artroom-robbers figured there was nothing in there. (guess where I hide things now) this was fact as the muddy footprints throughout the house stopped at the art room door!


Wednesday, June 09, 2010
More Alice Pictures
 More pages from the Alice in Wonderland swap. This is an 8 X 10 size page. Found a B & W picture online and printed, colored it and added it to scrapbook paper. I embellished it a bit and it's ready to be added to the book it will go in.

 This is a smaller book. Again, found online picture to print and color. This one is adhered to a background that i painted. I color copied the colored piece, then glued that to the paper. Cut out the original and glue dotted it on for dimention.
Subscribe to:
Posts (Atom)